Want to add larger tires or performance parts to your ATV? There are hundreds of engine-related parts to build more usable power, but that power has to be delivered properly to get it to the ground. Using our Yamaha Grizzly 660 CVT transmission, we wanted to show how to upgrade the stock clutch to improve performance.
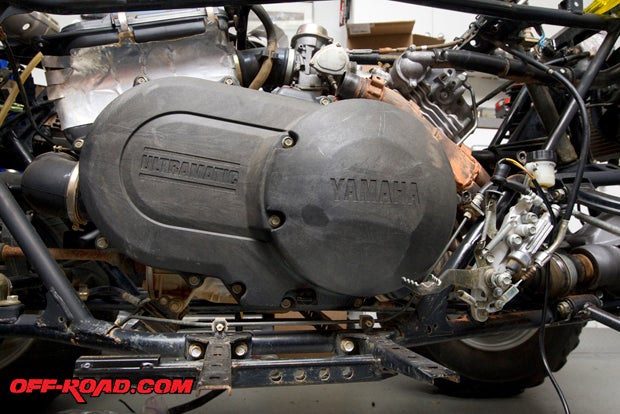
This totally bone stock 2004 Grizzly is getting larger tires and our 660 will be freshened up just a bit so we need to make sure the transmission can handle all the new power. In the photos youll notice the floorboard is already removed on the right side for a much easier attack on the clutch. It is not necessary to remove the front and rear plastics but I had a few other items to work on so these were removed as well.
Things Needed:
1. Large, clean workspace
2. Standard and deep well Metric sockets as large as 27mm
3. Needle-nose pliers or spring tool
4. 1-13/16ths socket
5. Flathead and Phillips head screw drivers
6. EPI clutch compression tool: CCT510
7. Torque wrench
8. 1/2-inch impact tool
9. Oil drain pan
10. Fresh oil for refill
11. Hand-held work light
12. Recommended: Factory Service manual

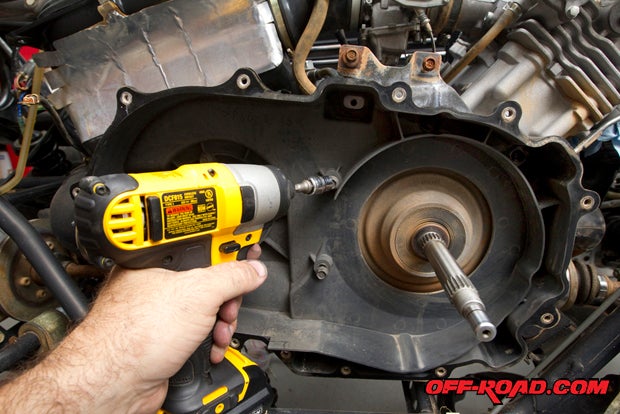
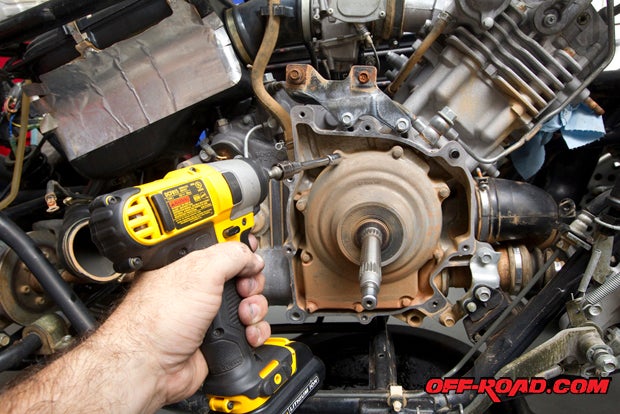
Starting with the Grizzlys clutch cover on the right side of the engine youll want to remove the clutch cover bolts with your 10mm socket. Begin removing the plastic clutch cover bolts but be sure to note the length and location, as these will vary and must be reinstalled in their correct location.
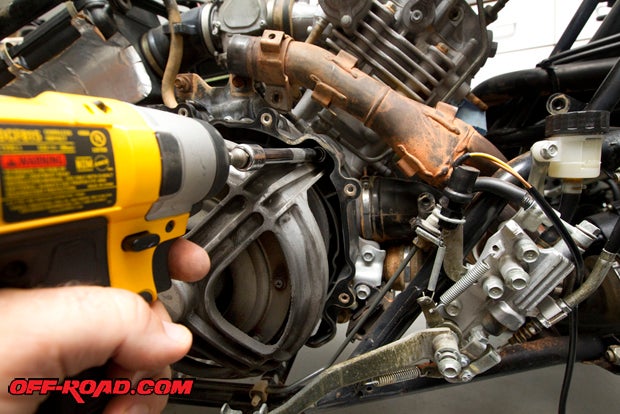
Once the CVT cover has been removed, now the four flanged head bolts that hold the clutch guard need to be removed. These bolts are tucked up inside the back cover and you will probably have to have a work light handy to see them. Once removed and their location noted, the clutch guard will pull right off.
Primary Upgrade:
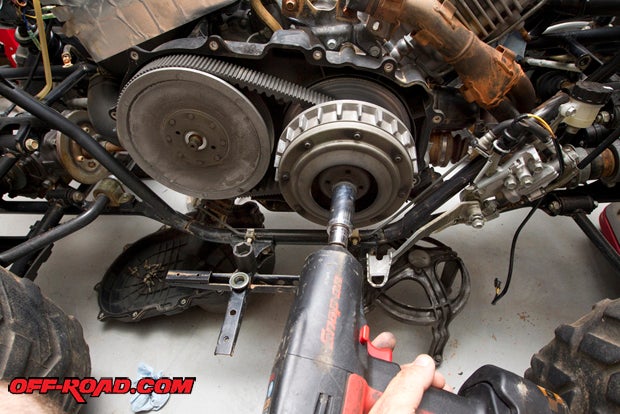
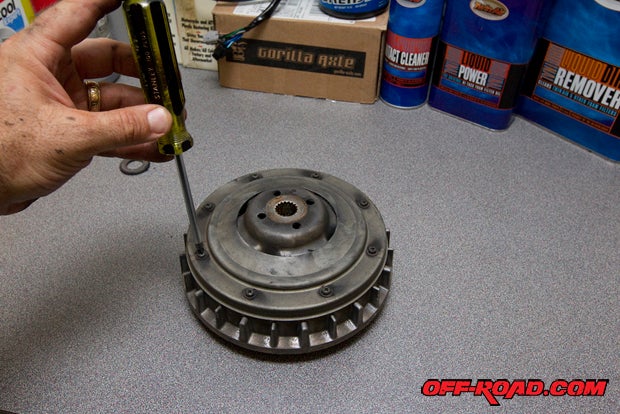
Using a 22mm deep well socket and the ½ drive impact tool you can now remove the primary retaining nut. This will allow the primary clutch to slip off the shaft and it is ready for the first upgrade on this piece.
The rollers/weights are located in this part just under the thin metal cover, which is held in place by eight Phillips head screws. Carefully remove the screws and gently pry up on the cover being sure to not cut the rubber o-ring that seals the cover to its base.
There will be grease inside this cover. Do not remove any grease from here.
After you have removed the cover you can gently pull one roller out. The goal here is to replace the metal bushing centers in the stock rollers with the new metal bushings supplied in the kit. The metal bushing center will push out and the new bushing supplied in the upgrade kit can be reinstalled. This is to be repeated until all of the metal bushings have been replaced. Our kit had eight identical bushings to replace the stockers. If the kit comes with different weights or bushings refer to the manufacturers recommendations on orientation of these rollers. Then you simply reinstall the rubber o-ring and metal cover on the primary and move to the next step.
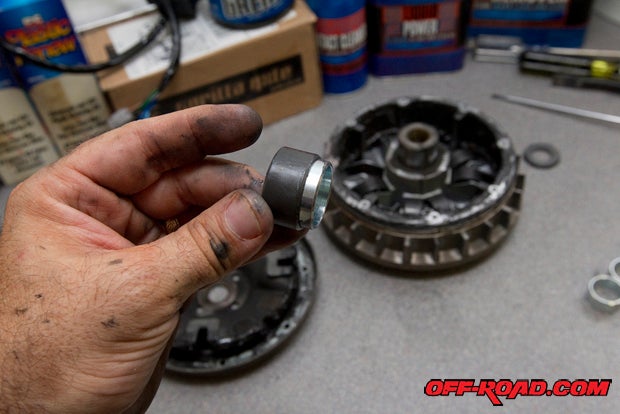
TIP:
If the metal bushing is a little difficult to get out, try using a socket the same size as the metal roller to help push the center out of the weighted roller. These only push out in one direction so be sure to not damage the roller assembly.
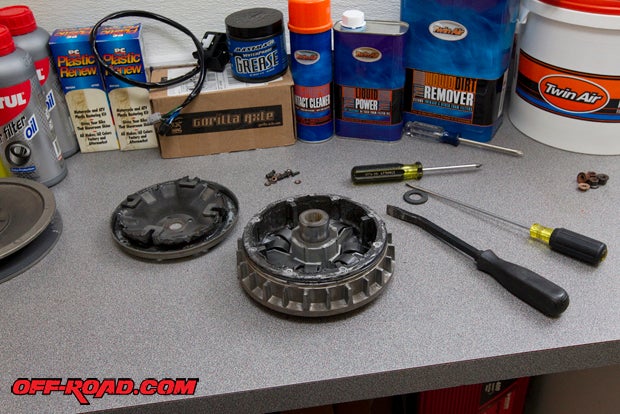
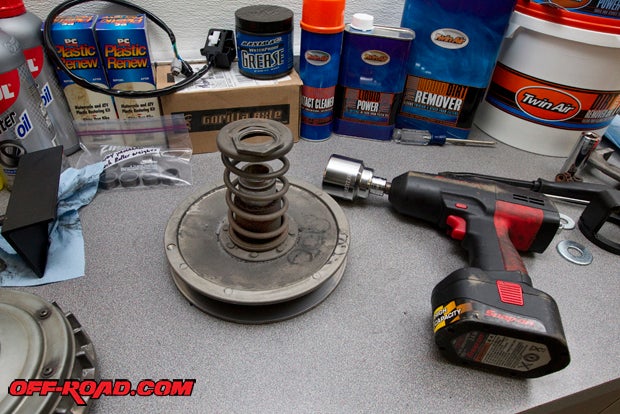
Secondary Upgrade:
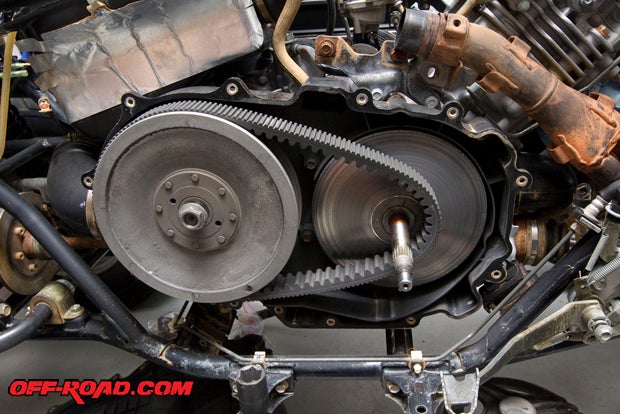
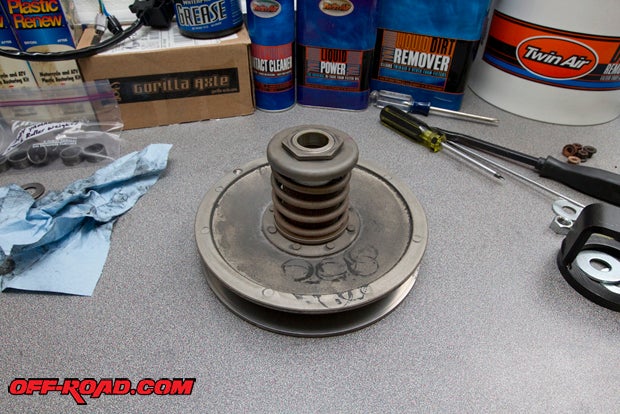
The secondary clutch is also held in place by a 22mm nut that will require the ½ impact to remove. Pull the secondary clutch and belt off of the Grizzly. Once removed, the secondary clutch will be turned over to reveal the large spring and thats what will be changed next. Using the 1-13/16ths socket, ever so gently loosen the spring-retaining nut approximately a HALF TURN. This does not come off just yet. If the nut is removed without being in the EPI clutch tool, injury could occur because the spring is under extreme pressure.
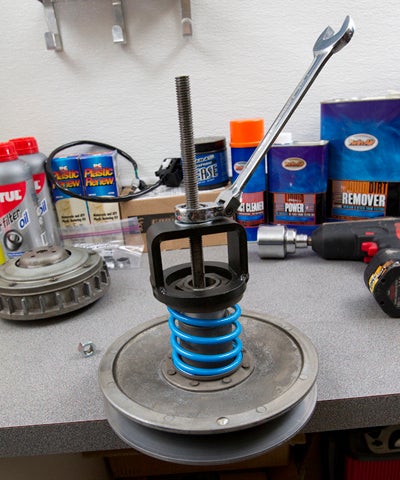
Next, place the EPI CCT510 onto the secondary clutch as shown in the pictures. The angle iron bottom of the tool fits nicely onto the edge of any counter. As the spring is compressed you will be able to spin the nut off by hand and then gently relieve pressure off the clutch tool. The process here is simple, as you just replace the spring with the new spring included in the kit and reverse the process to get the nut back on the secondary shaft.
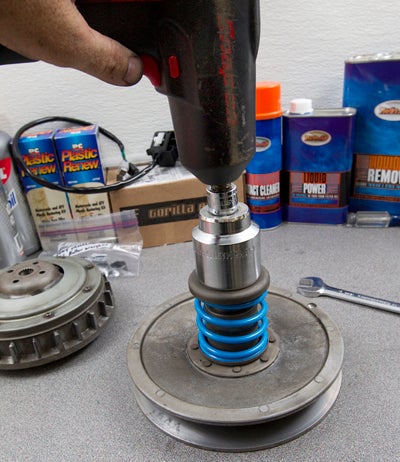
Use the CCT510 to compress the spring and spin the large nut back on to the shaft. Once the nut is secure, relieve pressure on the clutch tool and use your torque wrench to torque the nut to 72 ft-lbs.
Final Primary Upgrade:
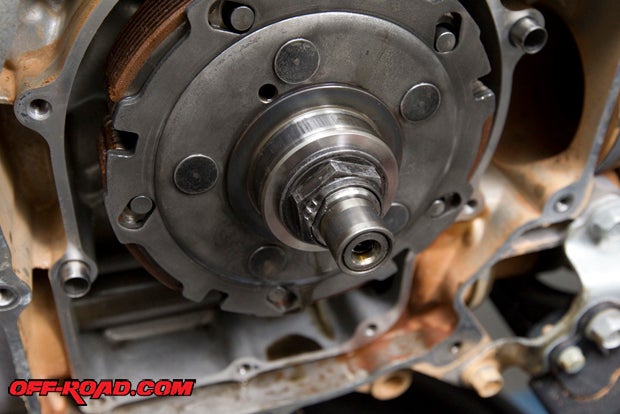
Remove the remaining primary clutch from the machine and drain the oil out of the engine. Once the oil has completely drained, remove the internal clutch cover. Be sure to carefully remove this cover, as there is a directional bearing inside that can fall out when removing the housing. The gasket for this cover can be reused if not torn or damaged in anyway during the removal or reinstallation.
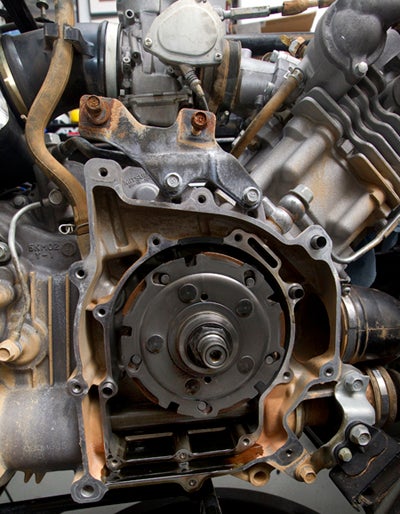
There is a 27mm nut that is peened on to the shaft. This has to be straightened before it can be removed. It is similar to a stake nut but with a much thinner outer rail that is pressed in to help hold it on.
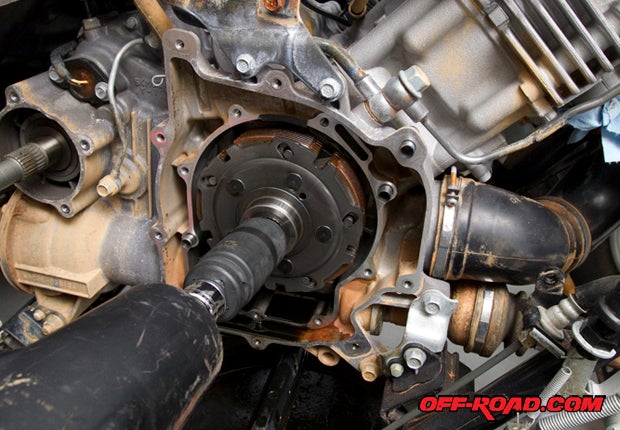
While keeping note of which side faces out, simply slide the clutch assembly off the shaft. Place the clutch pack on a clean counter or work surface and while pressing down on the pack remove the e-clips.
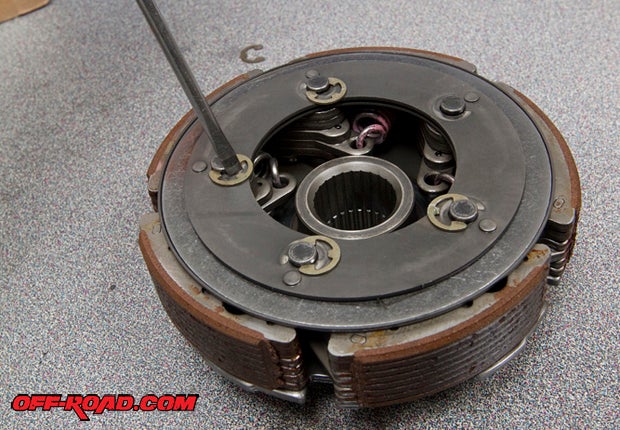
Keep track of the way each one is installed, as youll want reinstall them the same way. Now you can remove the three round metal plates that cover the springs we want to change. Keep track of which plate goes where it does matter.
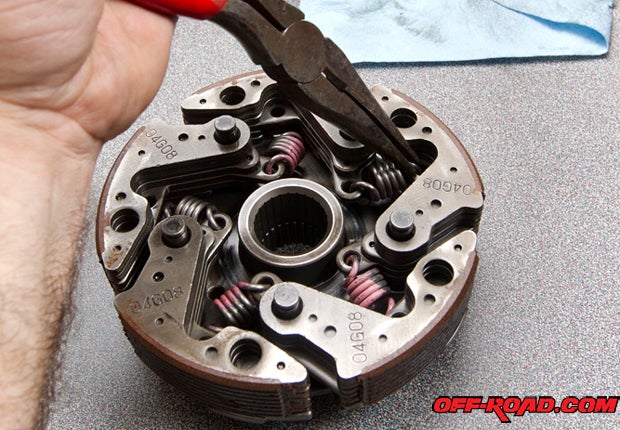
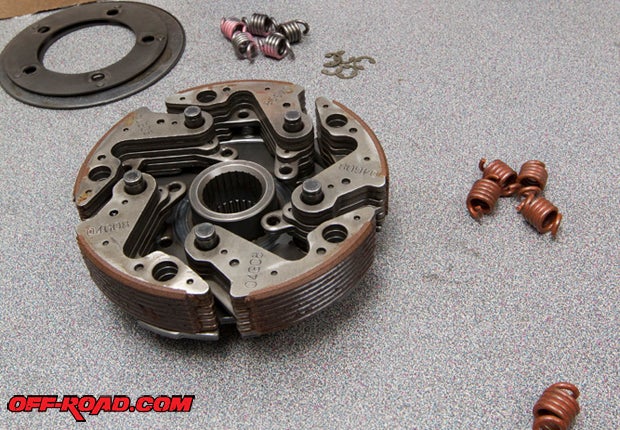
With the small springs exposed this is where it gets really fun. Well, not really, but I know you can do it. Each spring has to be removed and replaced with one of the new ones in the EPI kit. Hook the spring in the outer hole first, and then using your spring tool or needle-nose pliers youll be pulling/prying to the inner hole. It will take some patience so take a deep breath and settle in for the ride.
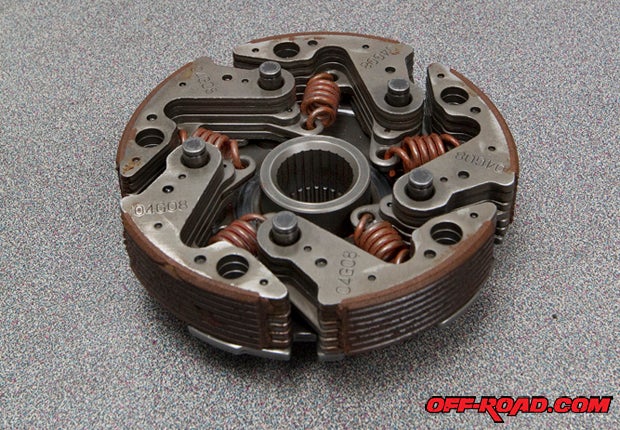
If you have made good notes, then once the springs have been changed everything will go back together just like it came off but in reverse order. Once you have reinstalled the internal clutch remember to torque the 27mm nut that holds it in place to 115 ft-lbs. The nut will need to be peened back like it was. Reinstall the housing cover and torque the bolts to 7.2 ft-lbs.
Everything goes back together:
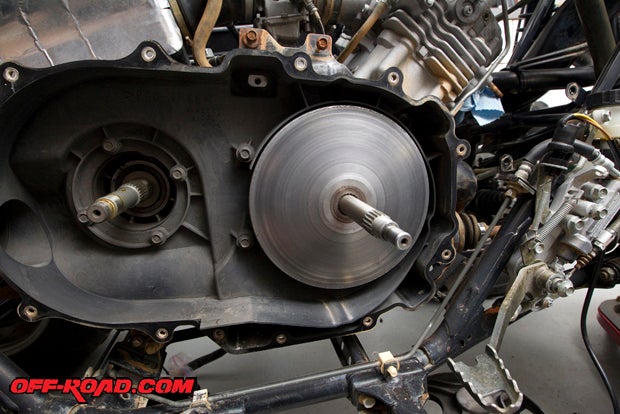
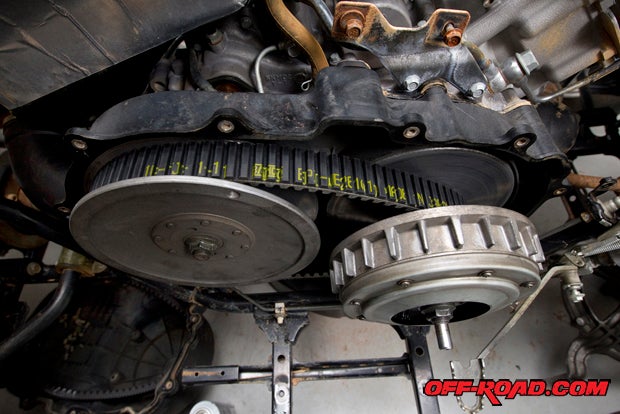
Slide the back half of the primary clutch back in place and then install the secondary clutch back on its shaft. Install the 22mm nut back on the secondary clutch and while making sure it slides on all the way, torque the nut to 72ft/lbs. After the nut is tightened place one of the clutch cover bolts into one of the holes on the front of the secondary clutch. Spinning this bolt into the hole should spread the secondary clutch apart so you can install the new belt. Most belts have an arrow indicating direction of travel. If your belt does not have an arrow install it so you can read the part number.
Next, reinstall the front half of the primary clutch. Be sure to hold the two halves of the front primary together so the rollers do not fall out. This clutch half should slide on easily. If the clutch doesnt seem to go on far enough to tighten the nut properly (it should slide all the way on to the edge of the splines) you might have a roller out of place or the belt might be blocking it. If needed, move the belt up and down to see if the clutch will slide on farther. Once the clutch is fitted properly you can install the 22mm nut and torque it to 85 ft-lbs. Be sure to then remove the bolt that was threaded into the secondary that helped spread it apart.
After the primary is tightened, replace the clutch guard and CVT cover being careful to install the cover gasket without pinching it along the way.
Results:
After everything has been reinstalled and checked twice its time to go out and ride. Be sure to give the belt some easy miles to allow for break in. This is a time-consuming upgrade but it is well worth the trouble.
EPI has many upgrades for clutches in many different ATV and side-by-side models, so when youre thinking of an upgrade be sure to give them a call at 218-829-6036 or visit them on the Web at http://www.epiperformance.com/.
|
Off-Road.com Newsletter Join our Weekly Newsletter to get the latest off-road news, reviews, events, and alerts! |
Follow @Off-Road
 Your Privacy Choices